DIY wall hanging vase


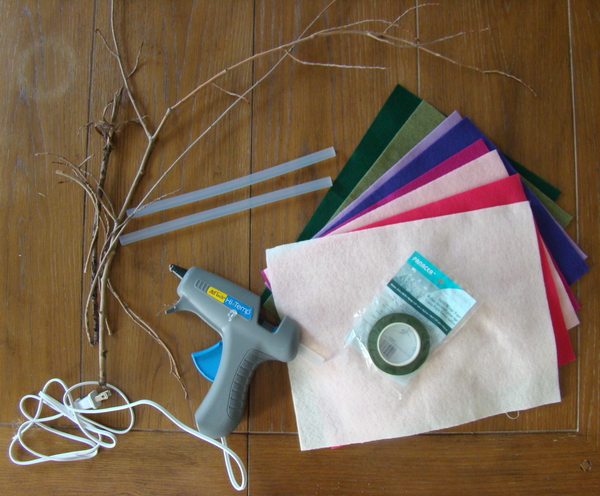
WHAT YOU NEED:
– hot glue
– scissors
– drill (optional)
– screwdriver
– sticks
– wine bottle (or any kind of glass bottle- i used izze!)
– one Craftistas kit (includes: multiple pieces of colored felt, flower tape, sawtooth wall hanger, 3/8″ threaded rod, 3/8″ wall hanger, 3/4″ split ring hanger, 12×1 1/4 wood screws, and stained 2×8 cut to 18″)
TO START:
1. gather all your materials. at the end of this post you will see how you can get a bag of materials sent straight to your doorstep so that you can create the very craft that you see in DIY’s like this or you can run around store to store gathering all the needed items. once you have everything, you can get started.
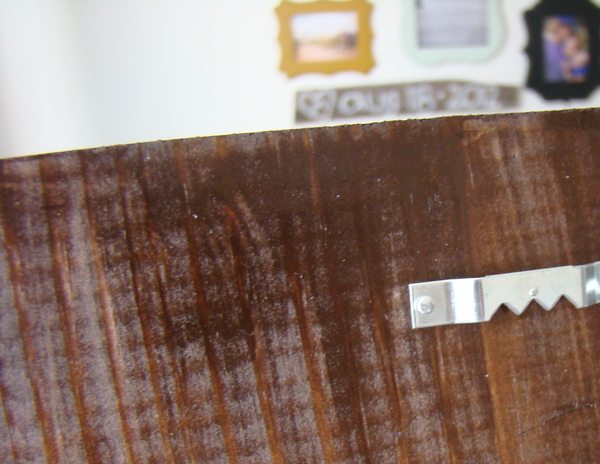
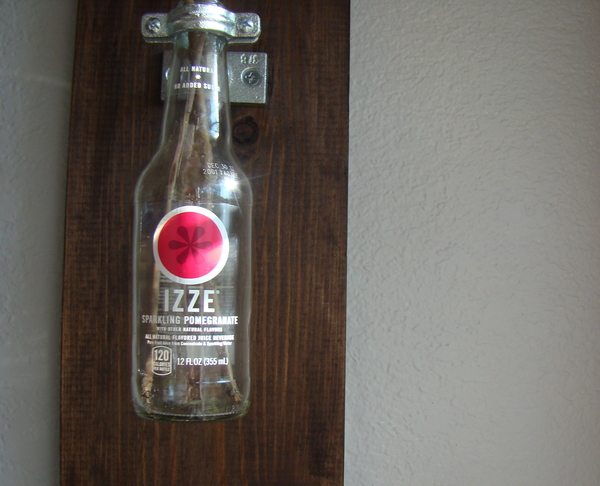
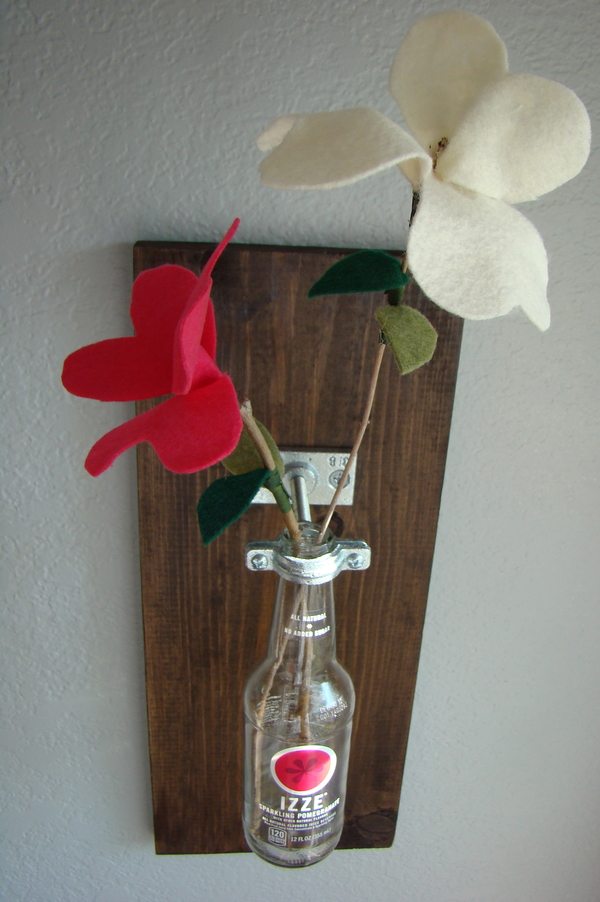
2. attach sawtooth wall hanger to the back of the wood near the top. make sure it is centered so that your vase is not crooked when you hang it on the wall.
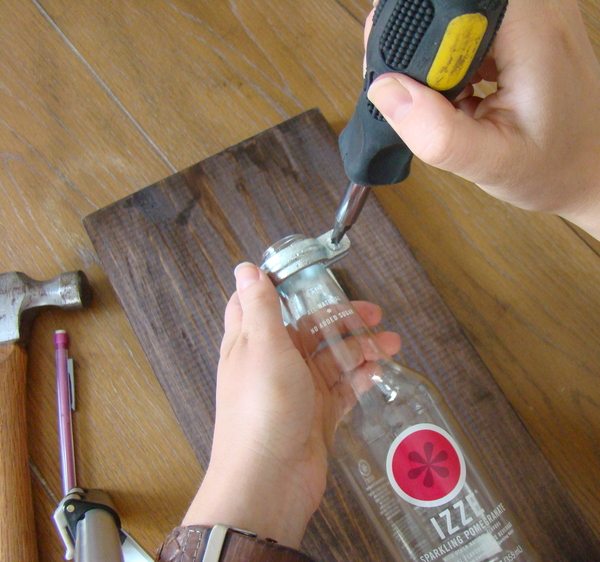
3. mark with a pencil where you want the wall hanger to be on the wood. place it toward the top to allow for a bottle to hang below. drill a small hole (not all the way through) in the wood for the wood screws. a drill is not needed if you just want to screw really hard but i just asked my husband for a little man help so that i didn’t have to worry about it.
4. screw in wood screws, add threaded rod and the split ring hanger.
5. add bottle and screw in tight making sure that the bottle hangs well when standing up.

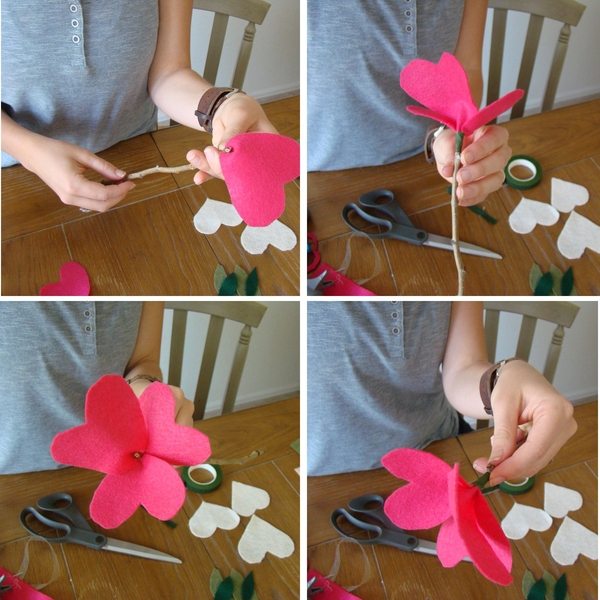
6. pick up sticks. i found a bunch underneath the tree by my house. if you do not have a tree near by just go for a little walk and look for some sticks – all you need is two or three!
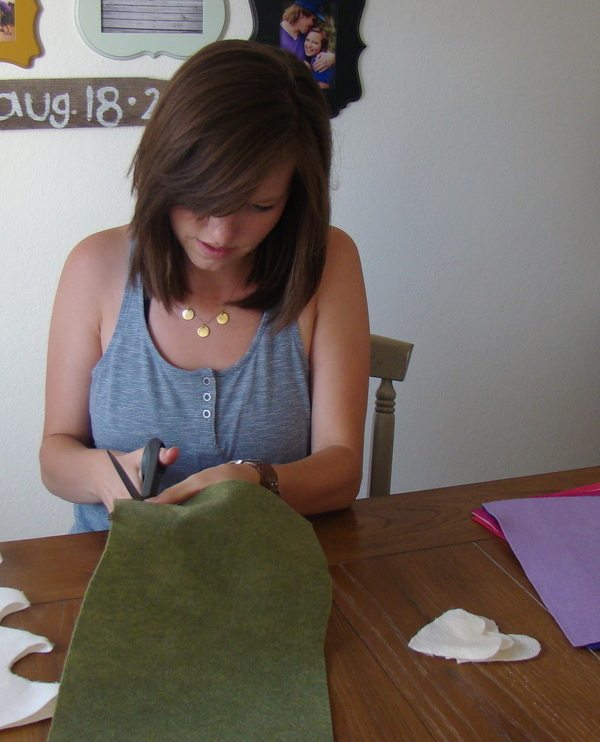
7. fold in half & cut felt into hearts. these will be the petals. you need around 3 or 4 for each flower
8. cut leaves out by making little ovals
9. pinch the bottom of the heart around the stick with hot glue and hold until it dries. continue around the flower until all petals are attached.
10. wrap a small piece of floral tape around the base of the flowers.
11. repeat with the leaves and then shape the flower to your taste.
12. put together, hang up, and enjoy!


HAHA! It is kinda fun to revisit old posts!