
DIY Curtain Rods
Ever since we painted the walls over a month ago we have not had curtains (or blinds) in our large front windows. I wasn’t as concerned about people being able to look straight in our house as I should have, I was more concerned with how empty that space looked. It needed a little life.
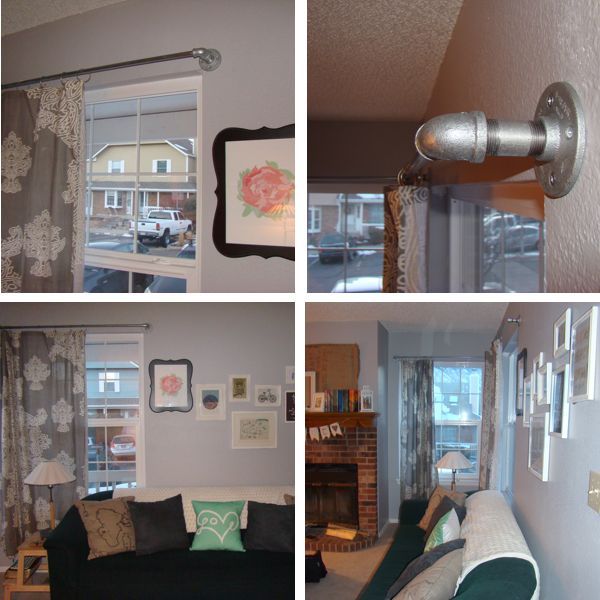
Because I am a DIY- er, I really wanted something unique and something cheap (being poor has it’s advantages, I would not do nearly as many crafts and projects myself if I didn’t have to!) HAHA ! I do enjoy the fact that “made in the Mayberry home” can be printed on a lot of my projects! I came across these galvanized pipes used to make curtain rods on one of my favorite blogs to stalk, Maiedae. I loved how they looked in her dinning room and I am in love with how they turned out in my living room.

WHAT YOU NEED:
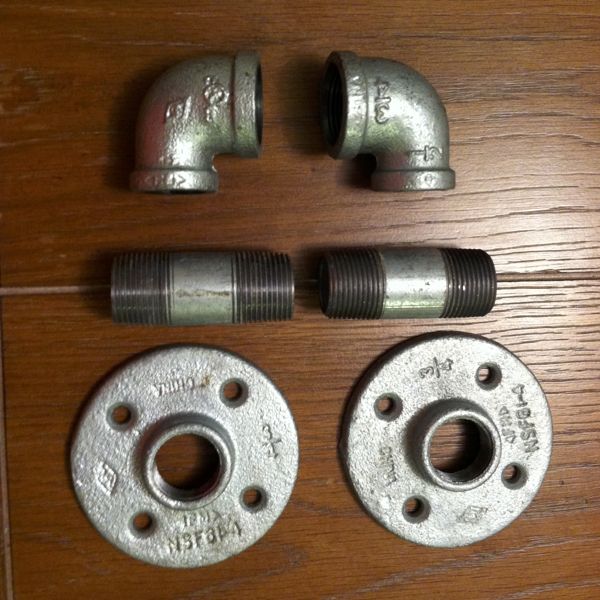
2 elbow joins 3/4 – 1/2
2 steel pipes with threading 3/4
2 floor/wall flanges 3/4
electrical pipe in length of your preference 1/2
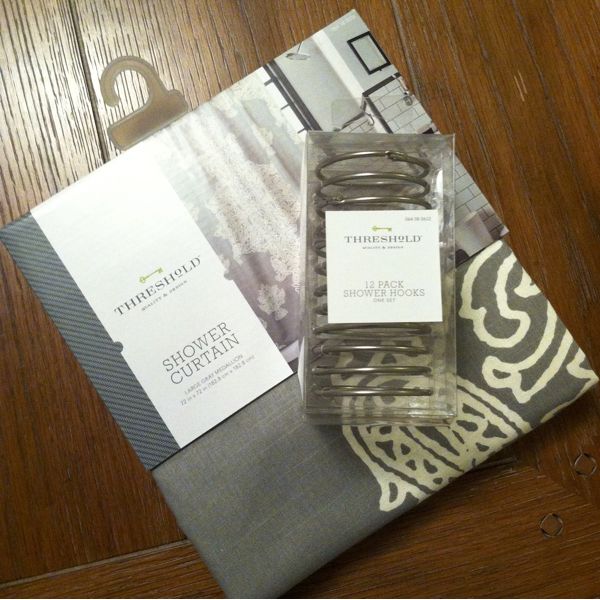
curtains panels (i used shower curtains to cut cost & i like the look of one panel)
wall screws
hack saw (if you need to adjust the length of the pipe)
drill
TO BEGIN:
1. hit up home depot and get all the metal pieces. you might have noticed that i wrote “electrical pipe” for the rod itself, you can use galvanized plumbing pipe but it is much more expensive and much more heavy. you will find all the other pieces in the plumbing isle. you can tell in the picture i used 3/4 of an inch for my pipes and my elbow switched the 3/4 into a 1/2 so that i can slide in my 1/2 electrical pipe. the electrical pipe does not have any threading but it fits snug in the hole.
2. pick out curtains. i used shower curtains because they were cheaper and i liked the one panel look. i also wanted something to switch out easy if i wanted to change them so i bought the mental hooks to go around the pipe. i went to target for these babies.
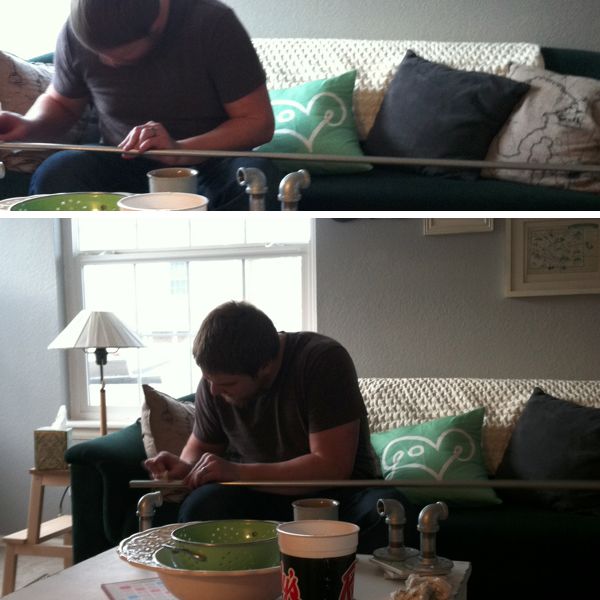
3. clean, measure, & cut. when you get the pipes they are kinda grimy. you might want to wipe them down with a rag or else your fingers will get black. then measure how long you want the pipe to be (it probably will be longer than you want). if it is an electrical pipe, it is thin enough to cut with a hack saw. “you can get your boyfriend or someone you want to be your boy friend to do that for you” – home depot man. OR i just made my husband, thank you home depot teenager for the advice.
4. measure again and drill holes into the studs on your wall (or use wall anchors). use the floor/wall flanges to measure where holes are needed – use a pen to mark the holes. drill each hole and then put the pipe (fitted together) back on the wall and screw those suckers in!
5. make sure to have the curtains already on the pipe before you click everything in unless you use metal clips like i did. these can easily be added or taken away without taking the pipes down.
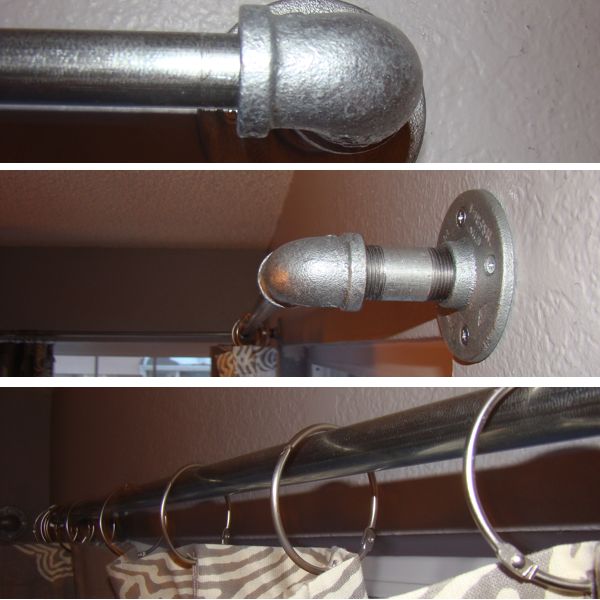
6. admire your handiwork and thank your husband.
TIME TO COMPLETE:
45 minutes
TOTAL COST:
$25 (each curtain rod) for all materials
$20 for the shower curtain
$6 for the metal clips
TIPS:
– make sure when purchasing all the materials you get the same size so that they fit together
– include your husband or man friend (and his friends) in on the hanging process. boys can hold heavy pipes and screw them into the wall at the same time.
– make sure you like your curtains or use clips like i did because once you put the rod up, it is very hard to take it down to switch out your drapes.
– use electrical pipe for the main rod to save on money

and that’s a wrap!
enjoy it!